Introduction
Gaspard is one of the five characters of "French Roast".
To design such a character one needs to follow several steps to the letter, as one follows a recipe, before reaching its final form and integrate it into the film. To achieve such a cake, ingredients (pre-production), preparation (modeling / rigging / animation) and cooking (rendering) are crucial before we can enjoy (integration / compositing) the latter.
1 / The Ingredients (pre-production)
Gaspard the Tramp: "But who is he?"
He's about sixty, has only three teeth, hundreds of flies around him, some fleas, and an astronomical amount of hairs. A former alcoholic, he has kept the traces of alcohol on his swollen red face. He wears an old raincoat, a long scarf, mittens, and shoes made up from newspapers... because his great passion is paper!
Armed with a pike, he walks along the streets with excitement picking up everything that seems to be about.
Below, the original design by Nicolas Marlet.
2 / The Preparation
Modeling
Take a modelsheet (preparatory drawing of the character)...
... turn on your computer, open your 3D software and start modeling / sculpting your character trying to keep the graphic style of the original 2D drawing.


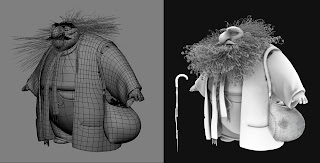
Add a few hundred hairs (2825 to be exact) and you have your model... To reach the final result, the hairs were initially modeled and placed on the head in order to validate the look of the character.
Then a 3D hairdresser (in the person of Christophe Le Derout) took over to develop a simulation of the Hair. This version is lighter and has been designed from only a dozen of modeled hairs. These have indeed been replicated in large numbers for the Tramp's beard and hair.
Rigging
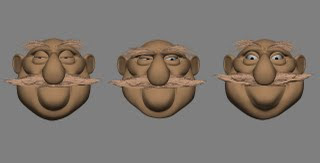
Now you're ready to use your 3D model, still hot from the oven, and garnish it with a skeleton and several deformers to get a beautiful 3D puppet (this step is called "set up" or "rigging"). This will allow you to give to the character all the postures and facial expressions you need for bringing him to life.
Regarding clothes, they were managed by a dynamic system called "cloth simulation". This was designed by the 3D Cloth expert Romain Privat de Fortunie.
Animation
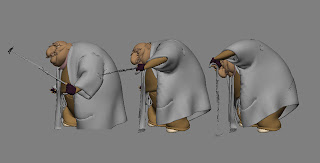
Now you have a beautiful brand new 3D puppet ready to perform all the acrobatics necessary for the film. But beware... before animating the character, it is important to prepare, to "play" the part yourself in order to get the intentions right... and remember to wear a ridiculous disguise to better slip into the skin of the character!
The aim of filming oneself before starting the animation is absolutely not to copy the movement frame by frame. It's really about experimenting with the possibilities of acting, finding the little accidents that make the character more believable and the overall action more natural... It is also an opportunity to explore ideas of comedy (sometimes push a gag further) and adjust the timing especially when it involves the simultaneous action of several characters.
Grab your mouse and immerse yourself in the 3D environment to (finally!) animate your character.
3 / The Cooking
Texturing over-render
The tramp once modeled needs a few colors and some textures...
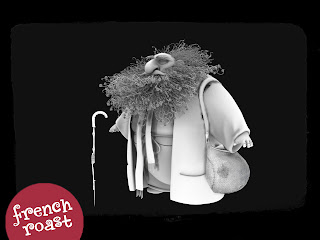
The first stage is to render the 3D model in occlusion* and to paint directly over this image (using a program like Photoshop) the intentions of colors and textures to get a clear idea of the final look of the character. The “texture over-render” was done by Jean-François Barthélémy. This step is very useful because it gives a quick visualization of how the character should look like in 3D.

In a second stage, we conduct what is called a UV unfolding**, it means that we literally unfold the character's skin in order to paint the textures (mapping) of the skin, clothing and accessories.
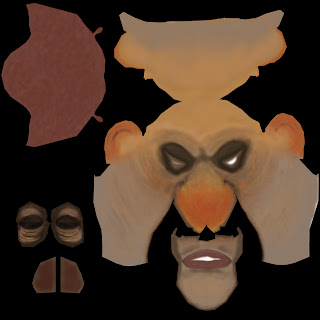
The UV unfolding and the mapping of the face of the tramp
Shading
The final stage is to create the material of the different elements on the character, more commonly known as the shader. This step allows us to work on the various aspects of the skin (translucency...) and the different kinds of materials (matte fabric, shiny metal, etc...). The texturing on Gaspard was done by Stéphanie Baillod who created this dusty and dirty look (but not too much!) that we wanted...
* Rendered with shadows.
** The principle is to unfold the 3D model in order to paint the 2D textures.
4 / The Tasting
Lighting
To integrate Gaspard in a street of Paris of the 60s, it is necessary to create an atmosphere that harmonize the background with the characters. The final look of the film had to be painterly and therefore it was necessary to create a lighting that would preserve and enhance the 2D textures created for the characters and the Matte Paintings done by Julien Georgel for the background.
Compositing
To create the hundreds of images where the tramp will appear in the film, he's rendered in several passes consisting of a multitude of different layers (such as reflections, translucency, hair, shadows, etc...). At that point, we are ready to mix him into the background (consisting itself of several layers).
Finally, we add a pass of special effects (flies flying continuously above the bum, smoke of the cigar, falling snow, etc...).
Here are the various layers of an image and the final result:
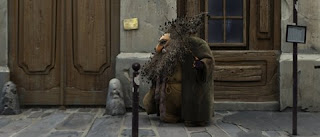
Gaspard required a year of work to achieve the result you see in the film.


